
Logging into Simple Syllabus
Log into Simple Syllabus using your institutional credentials or Simple Syllabus credentials.
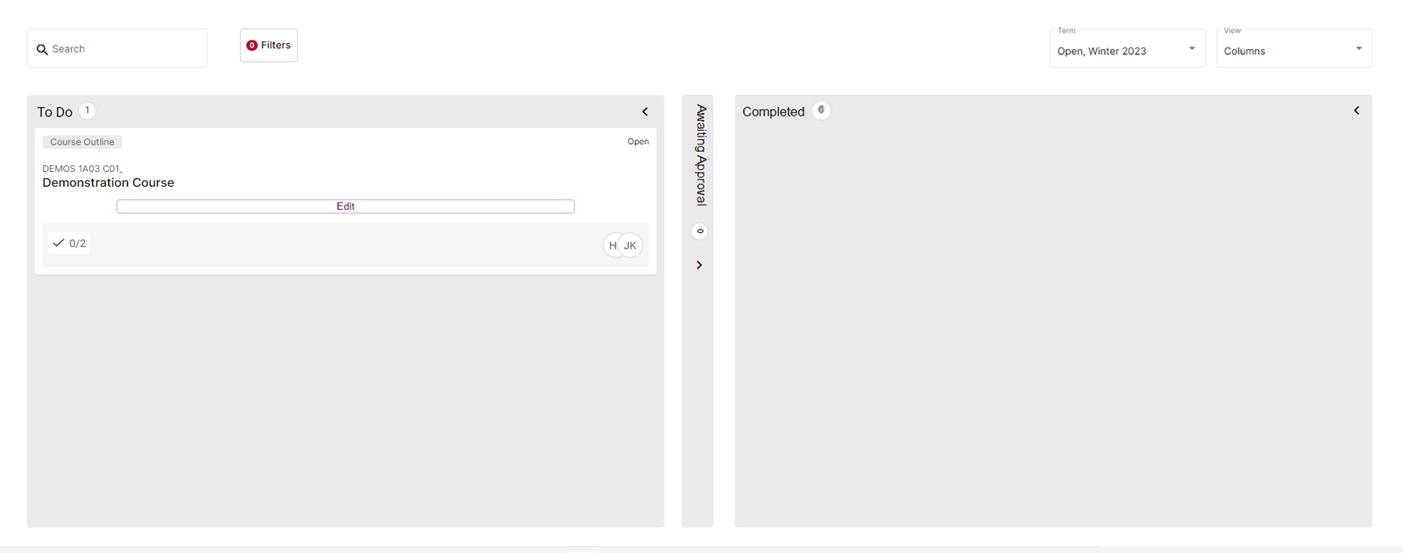
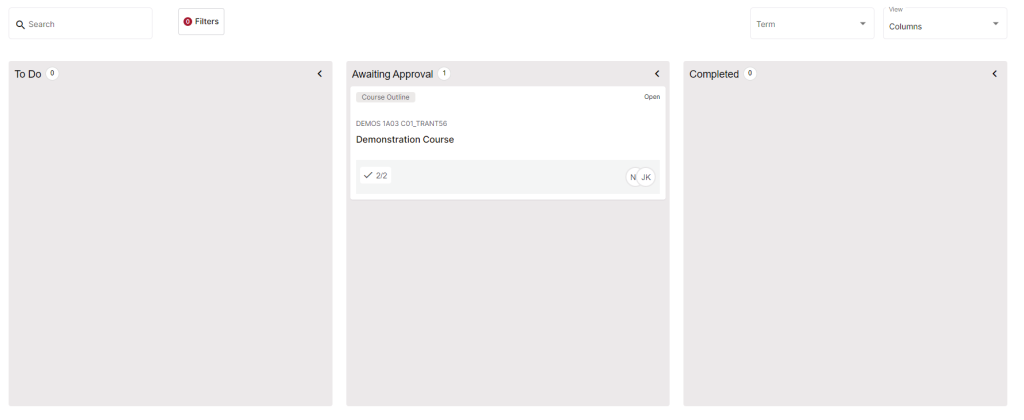
Home Page View
Once logged in, you will see your personal dashboard. This is divided into three columns: “To Do,” “Awaiting Approval,” and “Completed.” Syllabi listed in the “To Do” column are there for you to edit. Those found in “Awaiting Approval” are waiting to be reviewed by your department’s designated approver. Once your syllabus has been approved, it will move to the “Completed” column.
Editing a syllabus
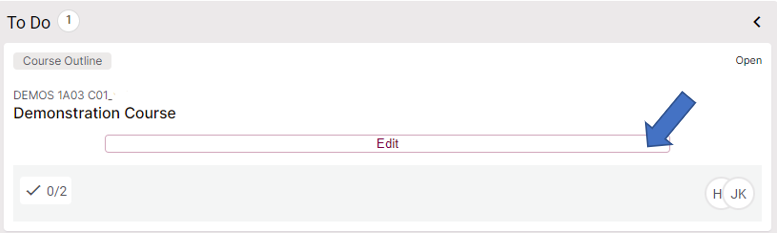
First step
Click the edit button to load the syllabus.
Editing Content Components
When editing a syllabus in the publisher, you will see your syllabus broken up into the different components outlined on the template. Components that cannot be edited at the section level will still be visible, but you will not be able to make any changes to them. Components that have been made editable at the section level will be available to you for customization. Below is a breakdown of how you can edit each component type:
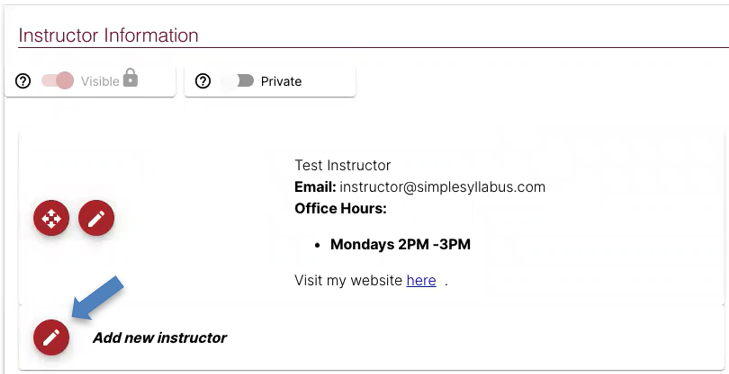
Instructor Components
1. To edit an instructor component, click the pencil icon to the left of the instructor information (some of their information, such as a name and email address, has likely auto-populated).
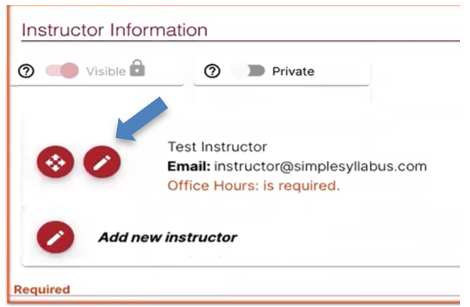
2. You can then make any necessary changes to info that has pre-populated as well as complete any fields that did not auto-populate.

3. To add an additional instructor, click the pencil icon to the left of “Add new instructor.”
Content Components
To edit a content component, type directly into the text box. You can use the toolbar at the top of the component to style and format text, as well as add links, images, videos, and tables. Additionally, you can click the block icon in the toolbar in order to make use of blocks to inject data from the Course Outline Portal onto your syllabus.
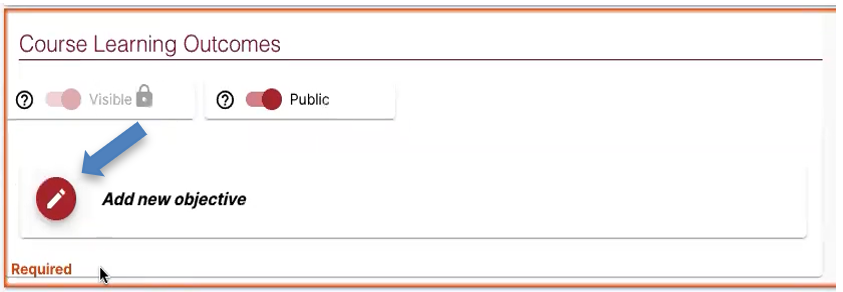
Objectives Components
1. To add an objective to an objective component, click the pencil icon to the left of “Add new objective.”
2. This creates a new objective field. You can then type out your new learning objective before clicking Save to keep it on the syllabus.
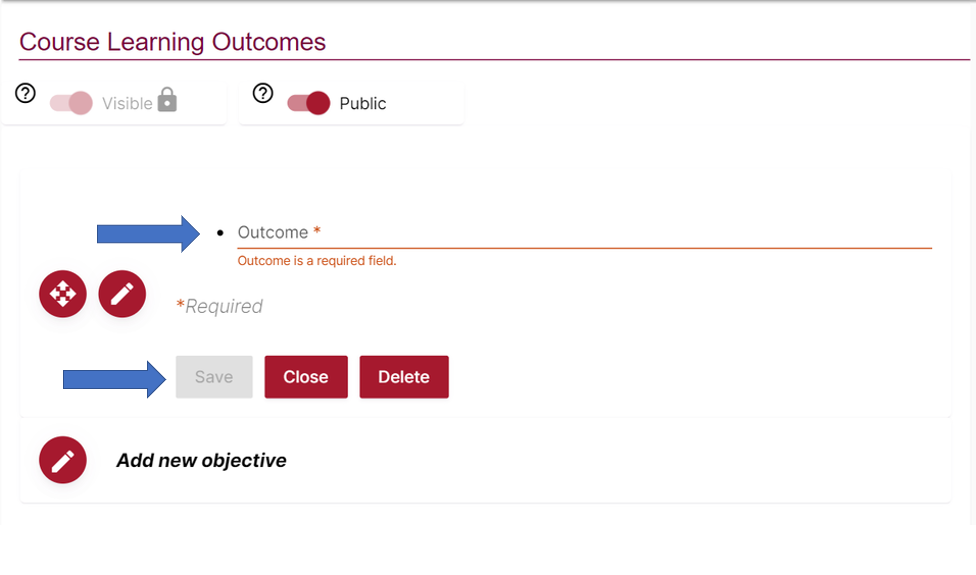
3. Repeat for each objective. Objectives can then be dragged and dropped to be reordered.
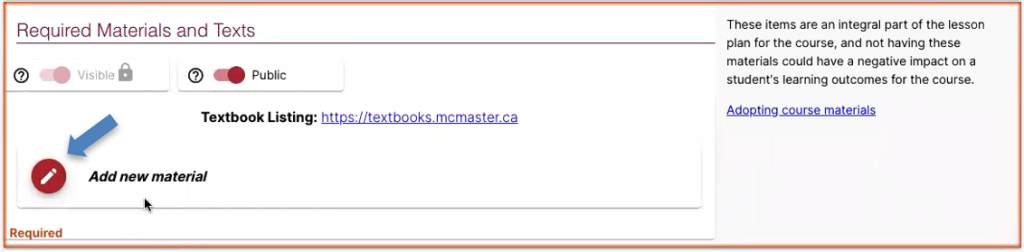
Materials
1. To add materials to a materials component, click the pencil icon to the left of “Add new material.”
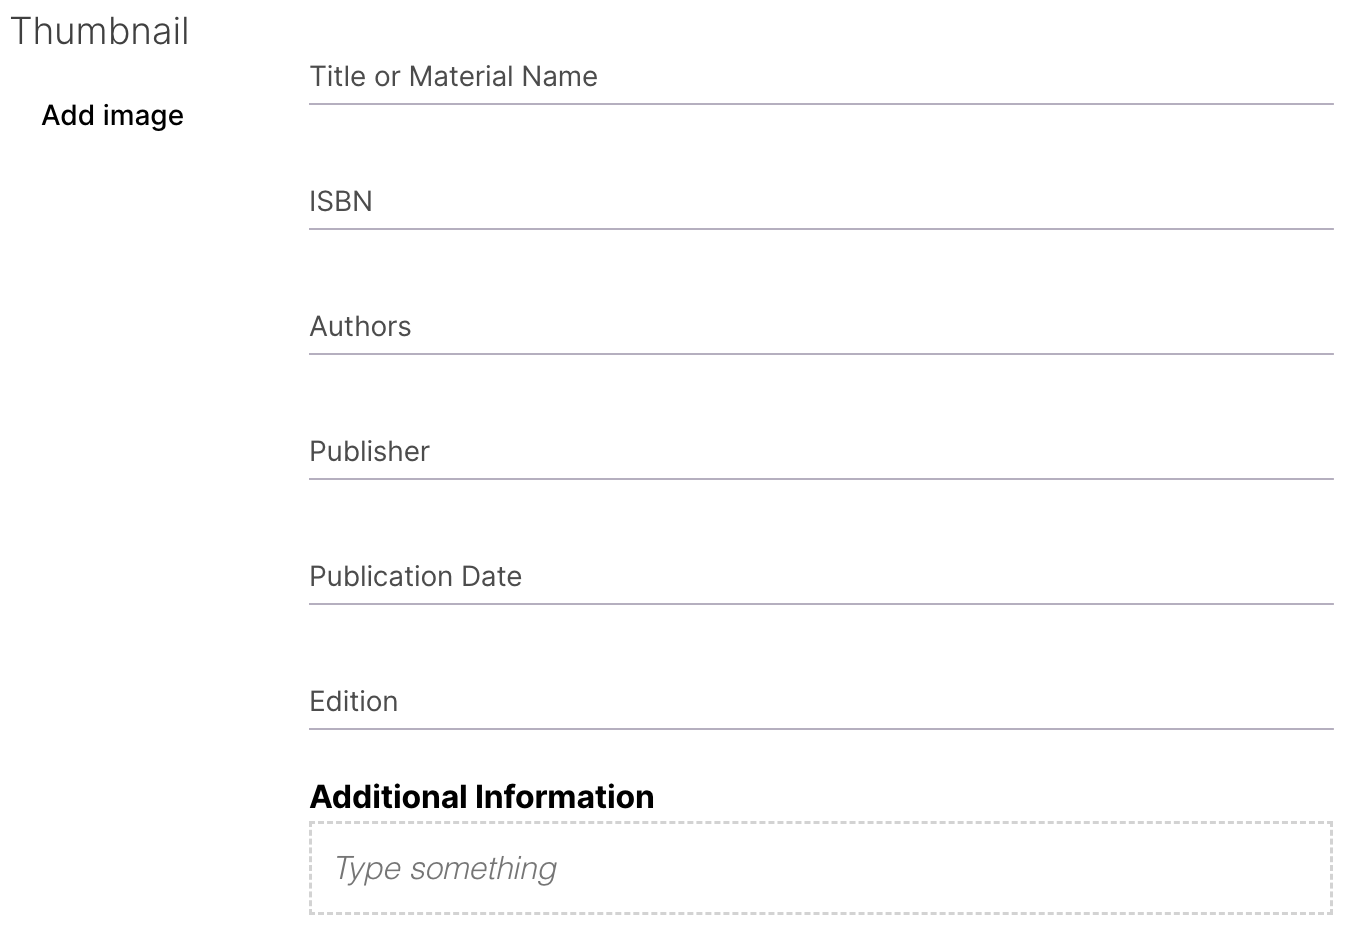
2. In the editing interface, you will see all of the fields that were created at the template level. For textbooks, you can manually input the title, ISBN, author names, publisher, year, and/or edition. If you are not using a textbook, you have a few choices:
- You could type the name of the material into the Title field
- You could also include it in the Additional Information field
- This is a rich text field, allowing you to include links, pictures, lists, etc. so it may work best for non-book resources
3. After all required fields have been completed, click save and then repeat this process for each additional material you would like to add to your syllabus. Materials can be dragged and dropped to be reordered.
Visible and Public Sliders
Each of the components you are able to edit will have both a “Visible/Invisible” and “Public/Private” slider for you to toggle.
- Visible/Invisible — The “Visible/Invisible” slider lets you choose whether or not to include a component on your published syllabus. All components are set to “Visible” by default, but you can toggle the slider to the left to mark it “Invisible.” Please note that this is only possible for optional components. Required components are set to “Visible” and cannot be changed.

- Public/Private — The “Public/Private” slider lets you choose who can view a particular component on your published syllabus. When set to “Public,” a component is visible to anyone with permission to view the syllabus. A component set to “Private” is only visible to students enrolled the class, the instructor(s) for the class, and portal admins.

Adding Components, Reordering Components, and Importing Content
You may also have the options to Add or Reorder Components and Import Content from another syllabi. You can find these buttons at the top left side of the publisher.
- Add — This adds an additional component to your syllabus. After clicking on the “Add” icon, you’ll choose the component type and give it a title. It will then be added to the bottom of the syllabus.
- Reorder — Clicking on “Reorder” allows you to rearrange how the components appear in your syllabus. Drag and drop components within the dialog box and then click Save to confirm your changes.
- Import — The import tool allows you to import content from any other syllabus in the course outline library. Clicking on the “Import” button will bring up a dialog box. You will first choose the syllabus you want to import. You will then go through and select which components you want to import content from. Confirm your selections and then portal will begin the import.
Submitting a syllabus
Once you have finished your syllabus, you can submit it using the “Submit” button at the bottom of the publisher. You also have option to leave a comment in the “Internal Comment” box. Any comments you leave will be visible in the “Show Full History” feed.
Depending on whether your faculty has an approval process in place, your submitted syllabus will either move to the “Awaiting Approval” or “Completed” column.”

Syllabus awaiting approval
If your faculty has an approval process in place, your submitted syllabus will move to the “Awaiting Approval” column. Your department or faculty’s designated approver will then go in and review your syllabus. You will receive an email once the approver has approved or rejected your syllabus.
Published syllabus
Once a syllabus has been approved, it will then move onto the “Completed” column.

If you need to make further changes to your published course outline, you can do that by clicking on the “Edit” button on the course in the Completed column. The same editing interface you used before will open up and you will be free to make changes. Once the new version has been submitted, it will go back to your approver. The old version will remain in place until the new version has been approved. After the new version is approved, it will replace the old version in the Course Outline Library and in the dashboards of all enrolled students.