Importing Content to a Course Syllabus in the Course Outline Portal
If you are teaching a course you have taught before or want to use some information from another course, you have two options for importing content to your outline.
Replacing a Course Outline
1. At the very top of the publisher, you will see a button with the words “Replace with a different course outline?” written on it.

2. Clicking on that will open a search bar. Select the term of your choice and then type in the name of the course you want to import from. You should see a list of courses which match your search criteria.

3. Click on the course you want to use for import. The portal will then populate your current outline with content from your selection.
Importing Selected Sections of an Outline
1. Along the top left side of the publisher, you will see a button labelled “Import.”

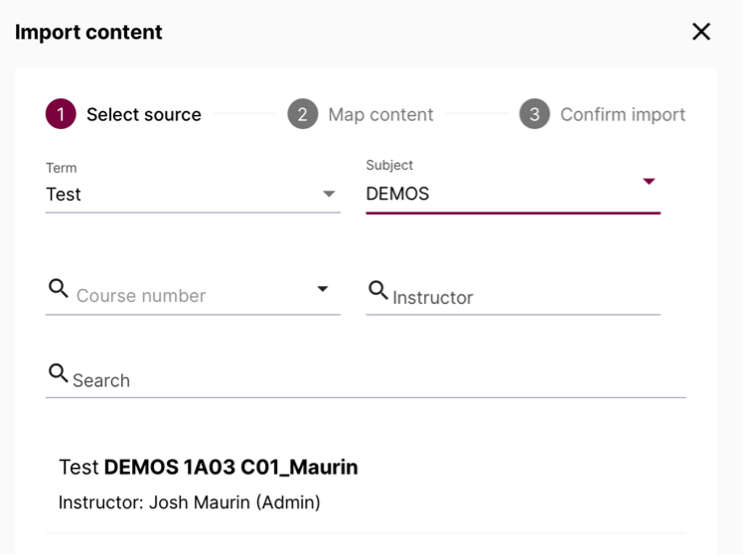
2. Clicking on that will bring up a three-step menu. The first step is to search for the course outline you want to use for import. This will create a list of courses matching your search criteria. Choose your selected course.

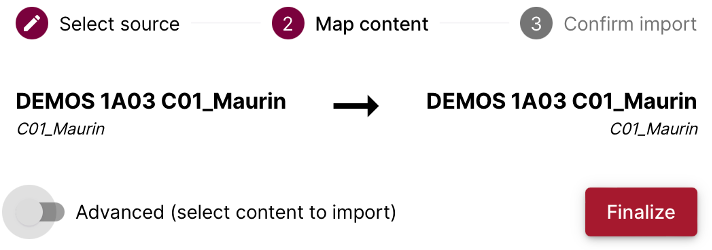
3. The second step is to choose which components you want to import from the other outline. By default, the portal will give you the option to import everything. If that is what you want, go ahead and click “Finalize.”

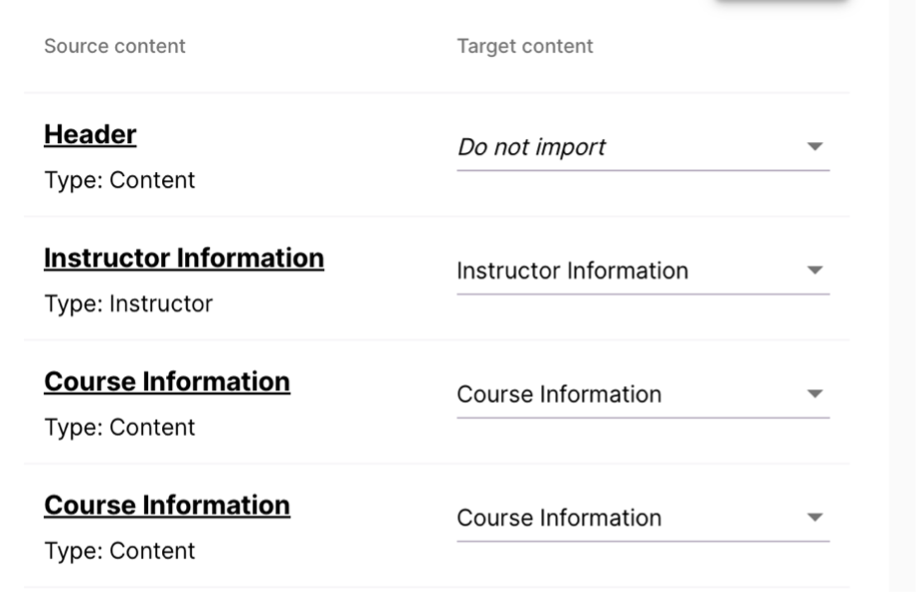
4. If you want to import only some of the other components, click on the “Advanced” toggle. This will bring up a complete list of every component in both your current outline and the one you are using for import.

5. The left column lists the components in your source outline (i.e. the one you are importing from). On the right, you can select which components in your current outline you want replaced and what you want them replaced with. Once you are satisfied with your selections, click “Finalize.”
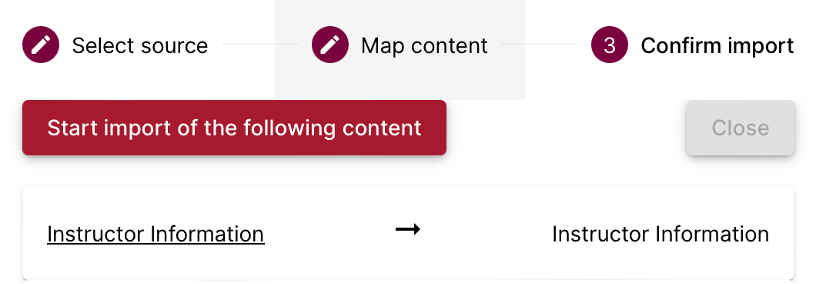
6. The final step is to review your selections and then to click “Start import of the following content.” The portal will then bring what you wanted from the other syllabus to the one you are currently developing.

